MARCH Assessment Mini-Series (Part 2): A — Airway (Keeping the Pipes Open)

In our last post, we kicked off the MARCH series by tackling the "M", Massive Hemorrhage. We talked about how uncontrolled bleeding is the leading cause of preventable death on the battlefield and in the civilian world alike. You’ve learned how to high-and-tight that tourniquet and pack a wound like a pro. But once the bleeding is under control, your job isn't done.
If the body is a machine, blood is the fuel, but oxygen is the spark. You can have all the fuel in the world, but if the "pipes" are clogged and oxygen can’t get to the lungs, that machine is going to shut down fast. That brings us to the second letter in our assessment: A , Airway.
At C&G Solutions, we teach the Citizen First Responder course at our training center in Mariners Cove, 3615 Oceanside Road, Oceanside, NY. We align our training with the Committee on Tactical Combat Casualty Care (C-TECC) guidelines and "Stop the Bleed" standards because we believe "good enough" isn't an option when a life is on the line.
Transitioning from "M" to "A"
Before we dive into the anatomy and the gear, let’s talk about the transition. In a high-stress scenario, it’s easy to get "tunnel vision." You might spend ten minutes perfecting a bandage while the patient is quietly suffocating.
Once you’ve addressed life-threatening bleeding, meaning the tourniquet is set or the wound is packed and holding, you must consciously move to the Airway. Take a breath, reset your focus, and check your gloves. If they are covered in blood from the "M" phase, change them or wipe them down if possible. You don't want to introduce more contaminants into the patient’s mouth or nose while you're trying to save their life.
The Easiest Test: "Can You Hear Me?"
Most people think airway management requires a PhD and a bag full of specialized tubes. While advanced interventions exist, the most effective assessment tool you have is your voice.
Walk up to the patient and ask a simple, loud question: "Hey, can you hear me? What's your name?"
If the patient answers you clearly, you have just completed a massive part of your assessment. If they can speak, their airway is patent (open). It means air is moving from the atmosphere, past the vocal cords, and into the lungs.
However, if you hear gurgling, snoring, or a high-pitched whistling sound (stridor), you have a problem. These are the sounds of a "pipe" that is partially blocked. If they don't respond at all, they are unconscious, and an unconscious patient is at the highest risk for airway obstruction.
The Conscious Patient: Position of Comfort
If the person is conscious but struggling, the best thing you can do is often... nothing. Well, not exactly nothing, but you should let them choose their own position. This is called the Position of Comfort.
This is especially crucial for maxillofacial injuries (trauma to the face or jaw). If someone has been injured in a way that causes bleeding inside the mouth or nose, lying them flat on their back is a death sentence. Gravity will pull that blood and saliva straight back into their airway.
If the patient wants to sit up and lean forward to let the blood drain out of their mouth, let them. Don't force them to lie down just because "that’s what patients do." In the Citizen First Responder course, we emphasize that if they are conscious and breathing, gravity is your best friend.
The Unconscious Patient: The Tongue Trap
When a person loses consciousness, their muscles relax. This includes the tongue. Contrary to popular myth, you can't "swallow your tongue," but it can absolutely fall back and block the throat (the pharynx). In fact, the tongue is the most common cause of airway obstruction in unconscious casualties.
If your patient is unresponsive, you need to intervene immediately.
1. Manual Maneuvers
The first step is manual. You can use the Head-Tilt/Chin-Lift or, if you suspect a neck injury, the Jaw-Thrust. These maneuvers physically pull the tongue away from the back of the throat. It’s a temporary fix, but it buys you time to grab your gear.
2. The NPA (Nasopharyngeal Airway)
If the patient is unconscious and doesn't have a gag reflex, it's time for the "Nose Hose", the Nasopharyngeal Airway (NPA).
The NPA is a flexible tube that you insert through the nose to create a clear channel for air. We prefer the NPA over the OPA (the plastic "J" shaped oral tubes) for citizen responders because NPAs are better tolerated if the patient starts to wake up. An OPA will make a semi-conscious person vomit, which creates a whole new set of airway problems.
How to use an NPA:
- Measure: Size it from the tip of the patient's nose to their earlobe.
- Lube: Use a water-based lubricant (usually included in the kit). If you don't have lube in a survival situation, the patient’s own saliva can work.
- Insert: Aim for the right nostril. Keep the bevel (the slanted tip) facing the septum (the middle of the nose). Push it straight back, not up. If you feel resistance, don't force it. Try the other nostril.
You can find high-quality, TCCC-approved NPAs at North American Rescue. We always recommend carrying one in your Individual First Aid Kit (IFAK).
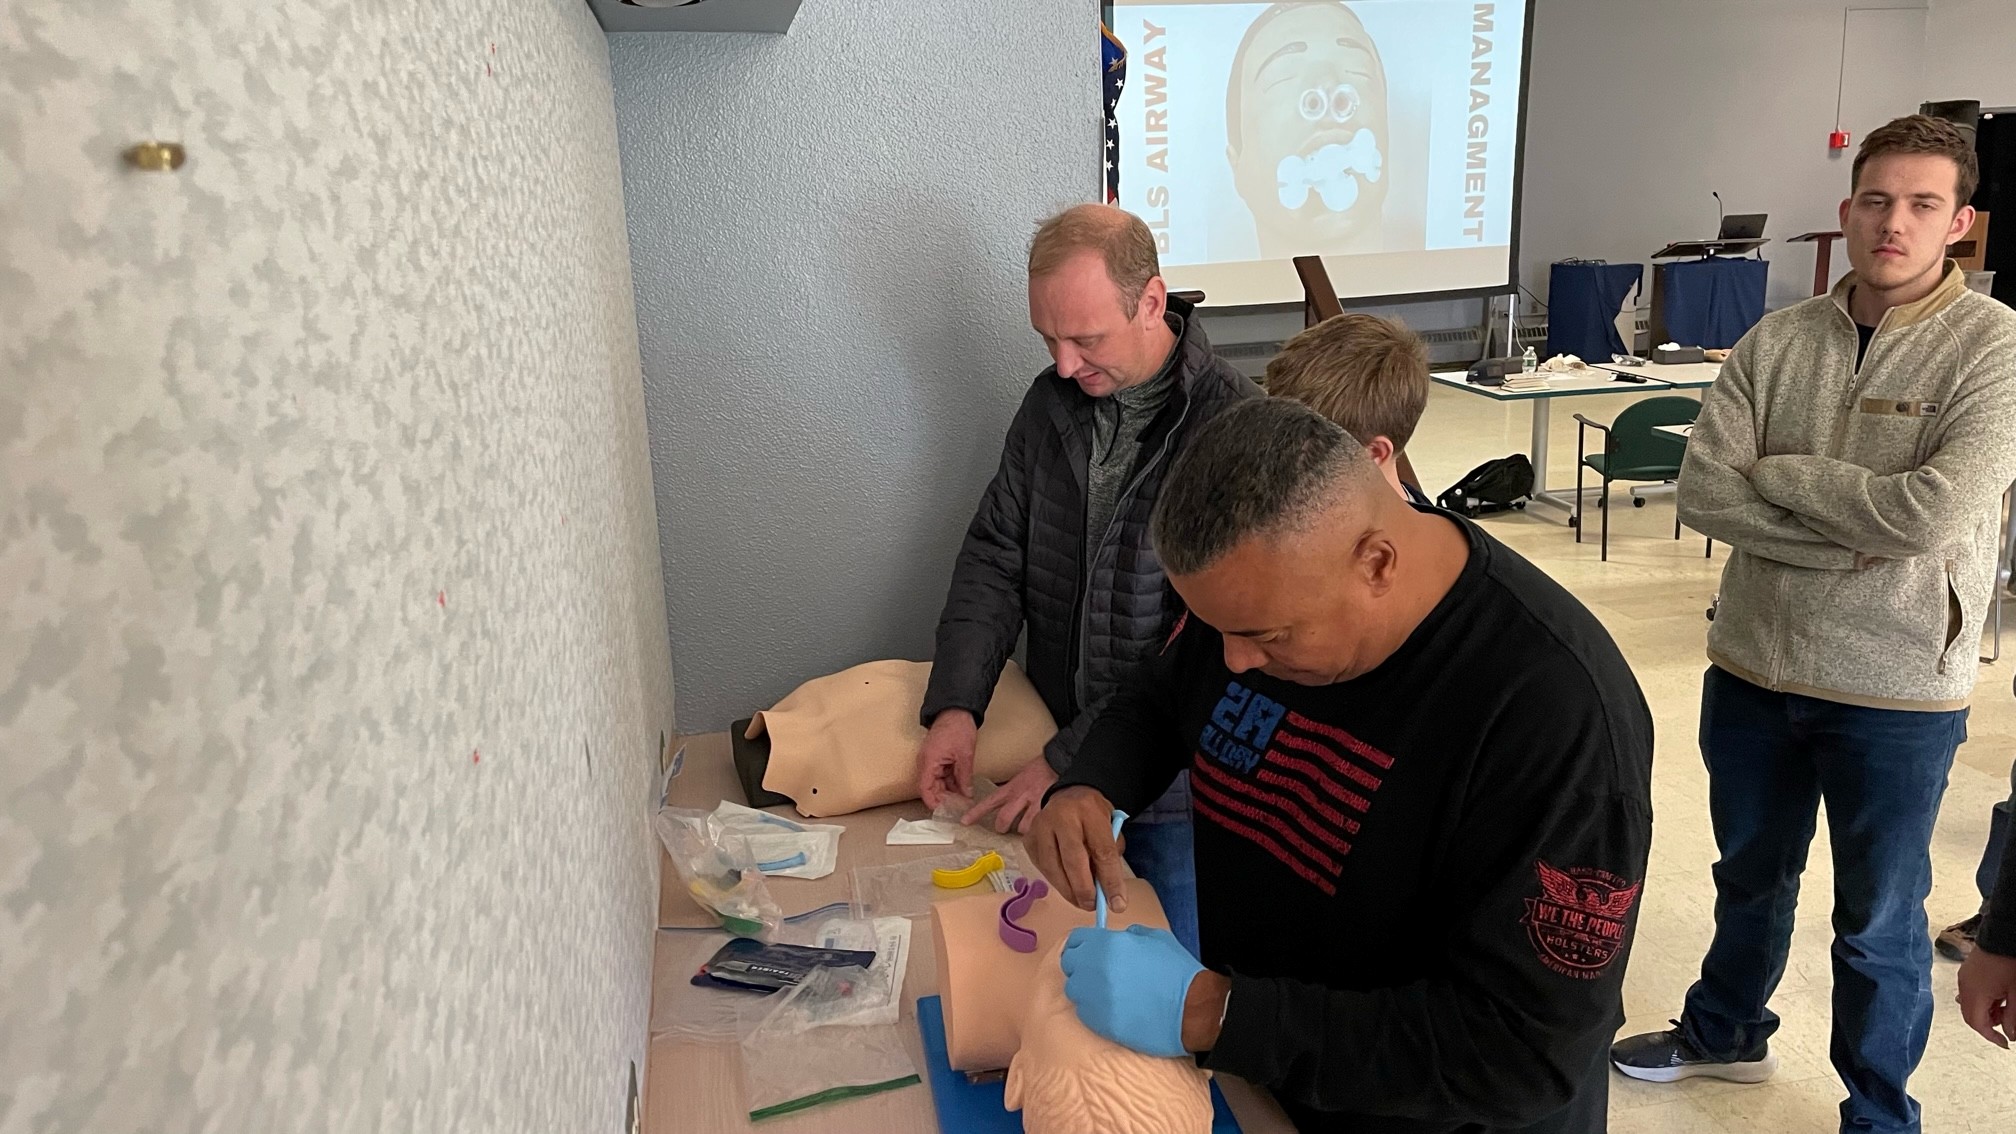
 Description: A close-up demonstration of a Nasopharyngeal Airway (NPA) being measured and prepared for insertion on a training mannequin.
The Recovery Position: Gravity Redux
If you don't have an NPA, or if you have successfully cleared the airway and need to move on to the "R" (Respiration) phase of MARCH, you must place the unconscious patient in the Recovery Position.
By rolling the patient onto their side (usually their left side), you ensure that gravity keeps the tongue forward and allows any fluids, blood, vomit, or bile, to drain out of the mouth rather than into the lungs. This is a foundational skill we practice repeatedly at our Oceanside facility. It’s simple, it requires zero equipment, and it saves lives every single day.
Universal Precautions and Safety
I’ve mentioned it before, but it bears repeating: Gloves are not optional. When dealing with airways, you are dealing with mucus, saliva, and often blood. Protecting yourself is the first rule of being a first responder. You can't help anyone if you contract a bloodborne pathogen or get sick yourself.

Why Training Matters
Reading a blog post is a great first step, but it’s no substitute for hands-on experience. Navigating an airway obstruction under pressure can feel like an uphill battle if you haven't felt the resistance of an NPA or practiced the "log roll" into a recovery position.
In our classes at Mariners Cove, we create realistic scenarios that help you manage the stress of a real-world emergency. We move beyond the "standard" classroom lecture and get you working with the gear until your confidence is through the roof. Most people think they’ll just "figure it out" when the time comes, but under stress, you don't rise to the occasion, you sink to the level of your training.
Summary Checklist for "A"
- Assess: Ask "Are you okay?" If they talk, they have an airway.
- Observe: Look for facial trauma, blood, or obstructions. Listen for snoring or gurgling.
- Position: Let conscious patients sit how they want. Put unconscious patients in the recovery position.
- Intervene: Use an NPA for unconscious patients to keep the airway clear.
- Reassess: Airway status can change. Just because it’s open now doesn't mean it will stay open if swelling starts.
Defend with skill, Act with confidence.
In Part 3 of this series, we’ll move on to R , Respiration. We’ll talk about sucking chest wounds, tension pneumothorax, and how to use a chest seal properly.
*
Want to get hands-on?
Check out our upcoming schedule for the Citizen First Responder course and join us in Oceanside to master these life-saving skills.
If you found this guide helpful, please share it with your friends and family. The more people who know these basic skills, the safer our communities become.
Well-Taught, Well-Trained
Safety always comes first. We teach proper firearm handling to help prevent accidents and encourage responsible ownership.